
Getting Started
The whole point of Fast Photo Sorter is to get a folder of shots down to your keepers as fast as possible. Here's the workflow in eight steps, plus stacking when you need it.
Looking for a key? See all the keyboard shortcuts, or press H in the app.
1. Open a folder
Point Fast Photo Sorter at the folder with your shots — straight off the card or wherever you keep them. The thumbnail strip fills in immediately, and the app remembers the last folder you had open.
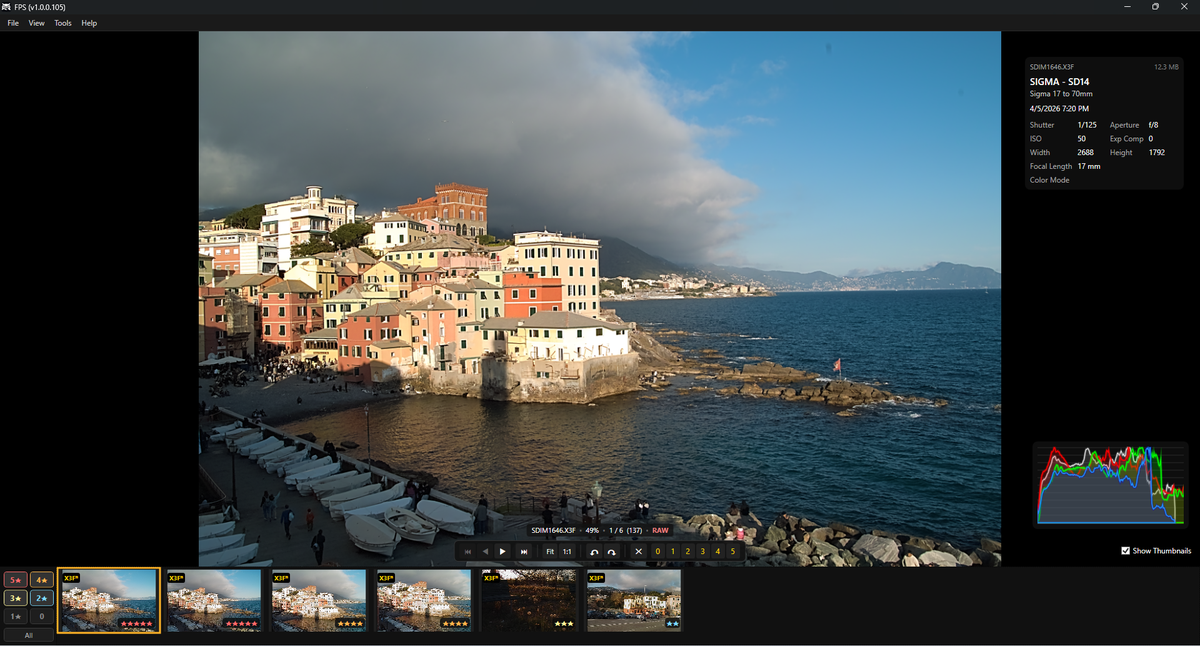
2. Browse at full speed
By default you're looking at the embedded JPEG preview, so moving through hundreds of shots with the arrow keys (or Home/End to jump to the first or last) stays instant — even for RAW files. This is the mode for the first fast pass: get rid of the obvious misses.
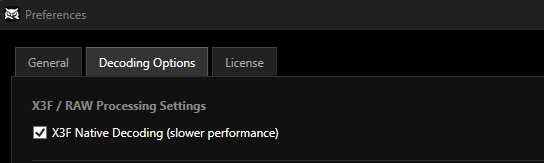
Native X3F decoding is a setting you switch on or off in Tools → Preferences → Decoding Options.
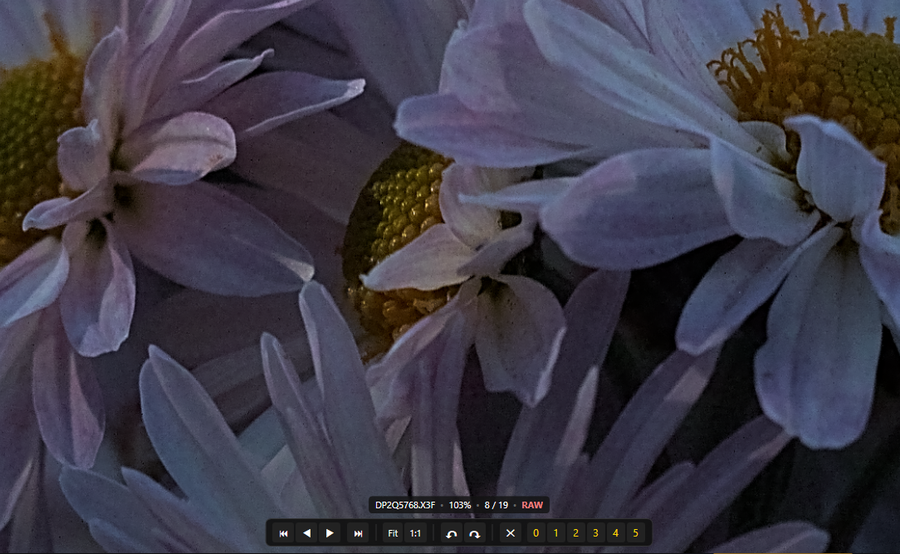
3. Check focus and highlights with the full RAW
When a shot is a maybe, switch to full RAW decoding and zoom in with the mouse wheel. Fast Photo Sorter decodes the native Foveon data directly, so you're judging real pixel detail, not a small embedded JPEG — and it stays fast enough to do this shot after shot.
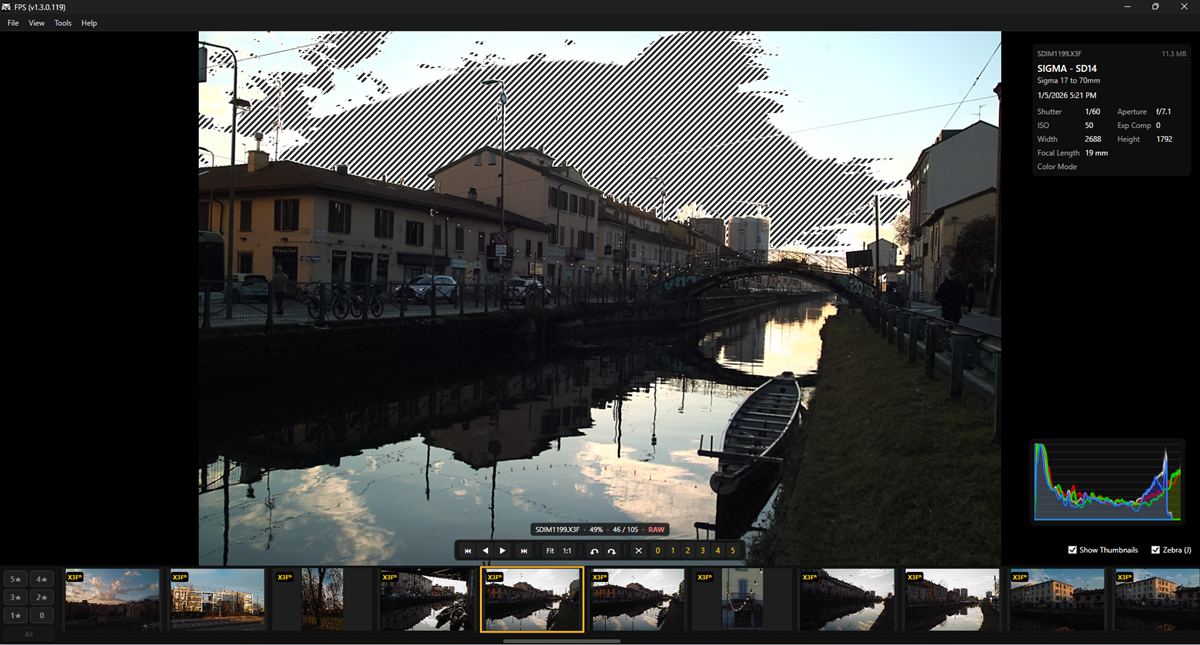
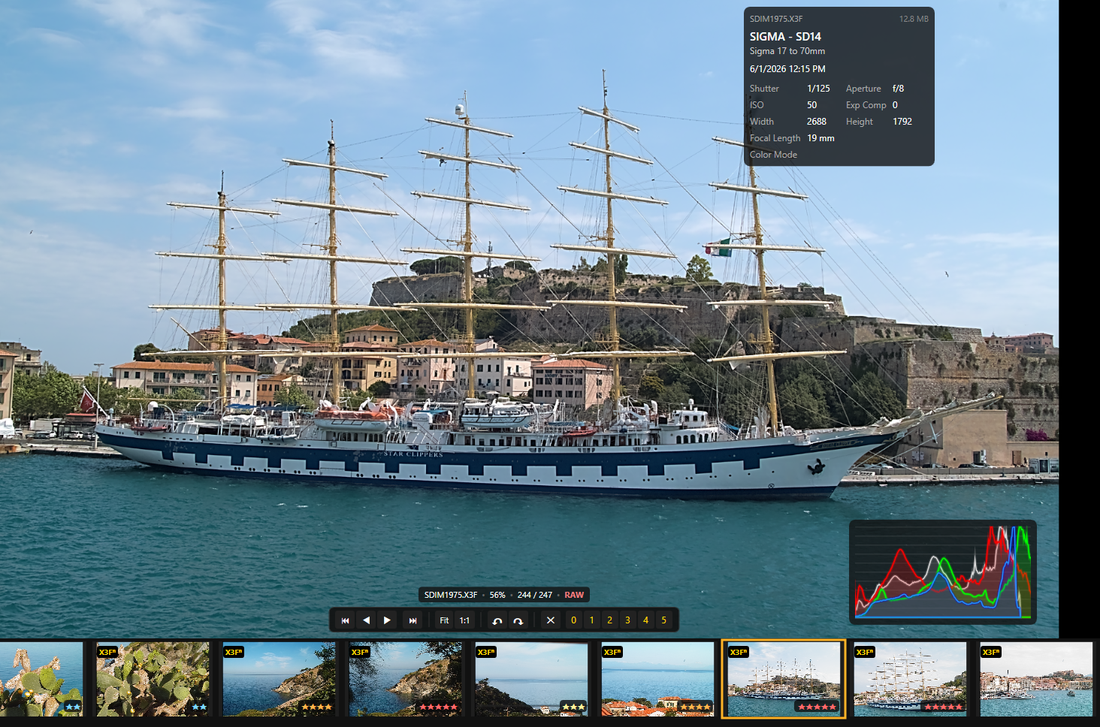
Check the highlights too: press J to show the zebra, diagonal stripes over the areas that are blown with no detail left. On X3F files it is read from the RAW sensor data, so it tells you where the Foveon layers really saturated. Press J again to hide it.
If your graphics card supports OpenCL, the full RAW is processed on the GPU and refines faster. You can turn this off in Tools → Preferences.
4. Rate as you go
Give each shot a star rating with the number keys as you move through the folder — no mouse needed. Ratings stay with the file, so you can come back to them later.
5. Filter down to your best shots
Once you've rated a folder, filter the thumbnail strip to just your 4- and 5-star shots. Click a parent folder to filter across all of its subfolders at once — handy after a multi-folder shoot.

6. Compare similar shots side by side
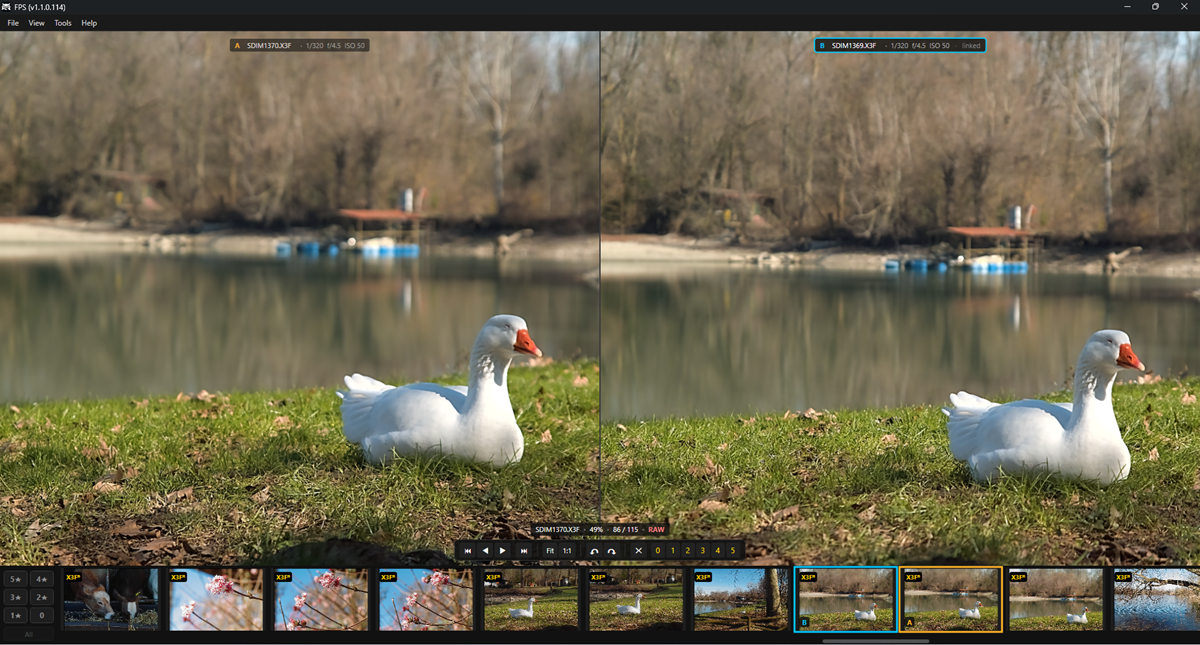
When two frames look almost the same, press C (or View → Compare Images). The current shot stays on the left as A, and the next one opens on the right as B. Click any thumbnail to load it as B, or Ctrl+click to load it as A.
Zoom and pan are linked, so the same detail stays in view on both sides; press L to unlink them. Tab switches the active side (its filename label is outlined), and star ratings, reject and rotation apply to that side. S swaps A and B, Esc leaves compare.
7. Fine-tune and export
For a keeper you want to hand off, adjust exposure, white balance, Highlights, Fill Light, contrast, saturation, clarity, texture or noise reduction, then export a 16-bit TIFF or a JPEG. These adjustments are there to help you judge and prepare a clean file — not to replace a full editor.
To check what your adjustments are doing, hold \ or Space: the photo switches to the default rendering until you release the key.
Texture brings out the grain of rock, bark and foliage; at 5 it matches Sigma Photo Pro. Clarity sharpens the finest detail.
Prefer to finish your X3F files in Lightroom or Camera Raw? Choose DNG as the output file type: you get a linear DNG, and white balance, tone and color are done in the raw editor. The development sliders are greyed out because they don't apply to the DNG.
Color Mode gives the photo the look of a Sigma Photo Pro color mode (Standard, Vivid, Portrait, FOV Classic Blue…) or of one of the FPS looks: Classic Color, Classic BW and Classic BW Soft. As shot keeps the mode set in the camera. Hover over a mode to see what it does.
For DNG, CR2, NEF, RAF and other Bayer RAW files, the Camera Profile list shows the color profile in use. You don't have to set anything: if Adobe Camera Raw, Lightroom or the free Adobe DNG Converter is installed, its profiles are found automatically. Pick another profile here to use it for all the photos from that camera.
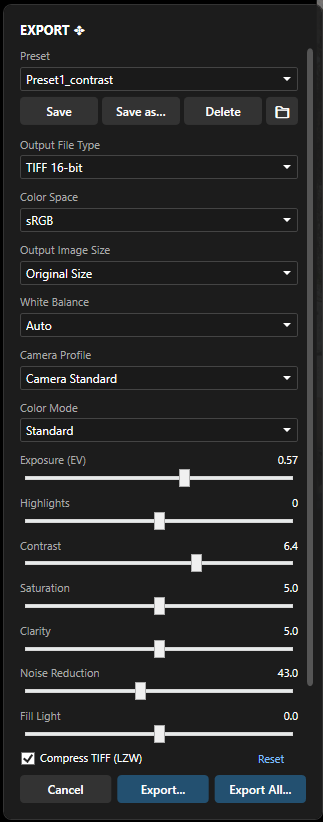
You can also export your whole rated selection at once, skipping anything marked as rejected.
8. Jump into SPP when you need it
For final, fine-art processing, open the current file directly in Sigma Photo Pro from Fast Photo Sorter — no need to go hunting for it in a file browser.
9. Merge several shots (stacking)
Mark the shots in the thumbnail strip with Ctrl+click (or Shift+click for a range), or select a Sigma X3I file, then choose File → Stack / HDR Merge. Press Esc to clear the marks.
In the stacking window, pick the mode:
- HDR / Denoise for bracketed exposures (more detail in highlights and shadows) or for a series at the same exposure (less noise). Keep Remove ghosts on when something moved between the shots.
- Long exposure to smooth moving water, clouds and leaves, as with an ND filter.
Leave Align frames on for hand-held shots, press Merge, then adjust and save the result as a 16-bit TIFF or a JPEG from the same window.
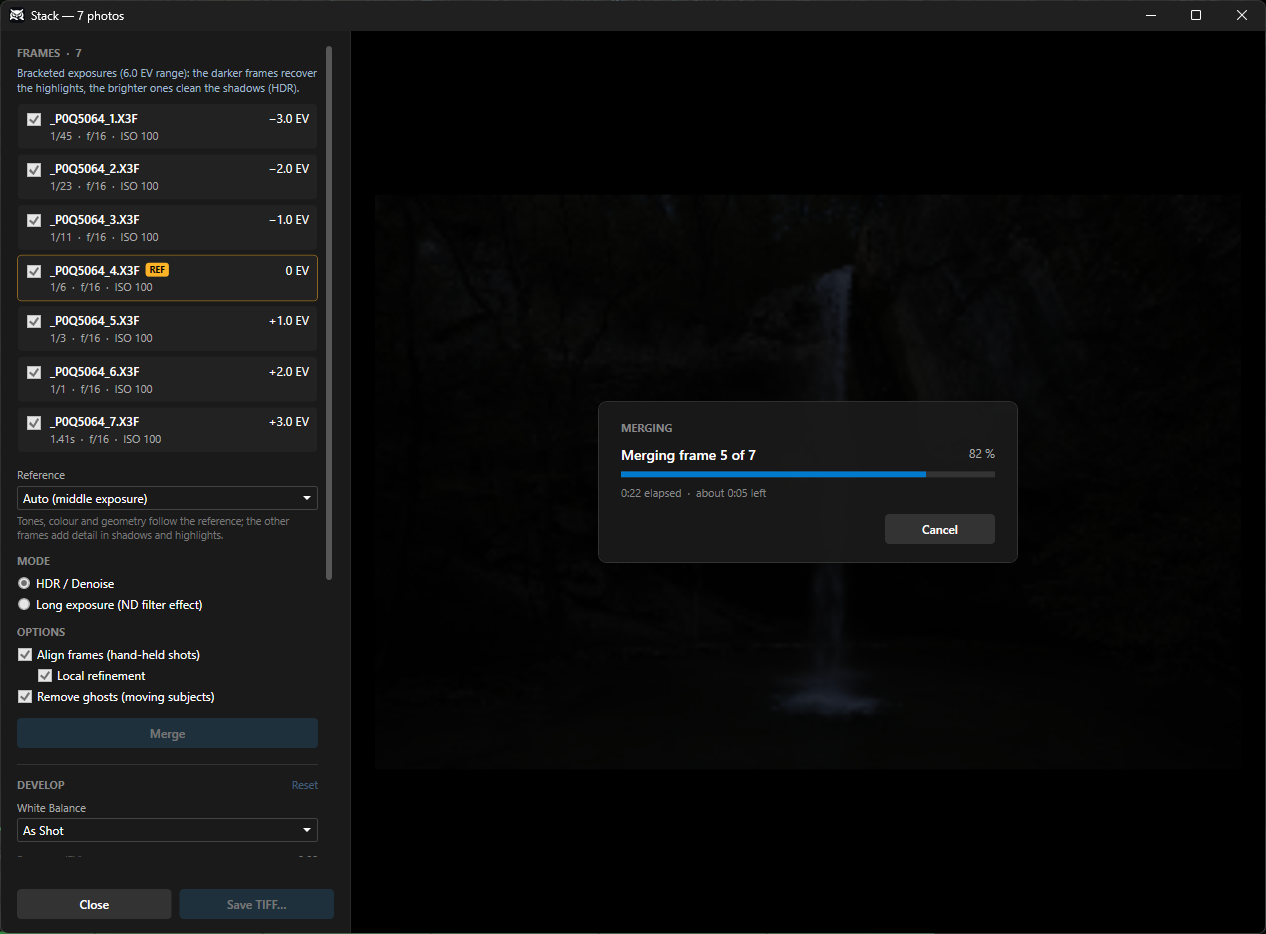
Photo: dpreviewblog · 500px gallery · Before and after